
An easy champion should not need a rehearsal before the first normal game. The player should be able to read the buttons, describe the job in one sentence, and still do something useful after the first mistake breaks the ideal sequence.
By that definition, Yuumi has the lowest basic input burden among these picks on Patch 26.18. She removes most movement and basic-attack execution while attached, aims only part of her kit, and can fall back to shielding, healing, slowing, and buffing an ally. Garen is the easiest champion who controls every step of his own movement. Malphite, Sona, Malzahar, Annie, Miss Fortune, Amumu, Rammus, and Sivir complete the top ten.
That order is not a power ranking or a list of the ten best teachers. Ease describes the work needed to operate the champion. It does not decide whether the role is simple, the draft is good or the patch rewards the pick.

Reviewed for modern PC Summoner’s Rift Patch 26.18 on September 10, 2026. The order measures inputs and recovery actions. Master Yi and Nautilus have balance changes, but the timing and commitment reasons for leaving them outside the easiest ten still apply.
This is not the beginner-teacher list
This page answers one narrow question: which champions place the smallest operational load on the player? It rewards easy inputs, a short job description, few recurring mechanical checks, and a fallback action that still works after an error.
The best LoL champions for beginners guide answers a different question. It chooses champions that teach transferable lane, map, wave, target, and positioning skills, even when another champion has easier controls. The easiest mid laners guide ranks complete mid-lane learning packages. The easiest ADCs guide goes deeper on bot-lane movement, wave access, and marksman habits.
That distinction is why Yuumi can be first here without becoming the universal recommendation for a new account. Attaching removes movement execution, but it can also hide positioning mistakes. Garen makes the player walk every trade and is therefore a better teacher for many people. Malzahar can clear a wave with a repeatable spell pattern, but that convenience does not automatically teach careful last-hitting. Low input and high teaching value sometimes overlap. They are not synonyms.
What easy means in this ranking
Mechanical difficulty is usually discussed as if every champion sat on one line from simple to hard. League has several different burdens. A player can execute a combo easily and still make the wrong decision. Another player can understand the right play but miss the spell that starts it.
This ranking uses four practical tests.
- Small execution burden. The champion uses few demanding aim, timing, targeting, movement, or input sequences. Point-and-click spells, broad areas, persistent effects, and forgiving recasts help.
- A one-sentence job. The player can say what a normal lane or fight should look like without reciting a combo tree. "Protect this ally" or "reach the carry and taunt" is useful. "Change the plan according to six weapon states" is not.
- Few repeated mechanical checks. Every champion tracks cooldowns, health, and position. The easy picks add only a small number of champion-specific checks, such as Annie’s stun counter or Garen’s passive recovery window.
- A useful fallback after an error. Missing the ideal play should leave one honest action. Wave clear, peel, a slow, a shield, a targeted disable, or safe recovery keeps the champion operational.
Decision difficulty is recorded but not allowed to rewrite the mechanical ranking. Amumu’s spells are easy to understand, while jungle pathing is not. Malphite’s combo is short, while choosing the right ultimate target can decide a game. Sivir can clear a wave with simple buttons, while ADC positioning still demands constant movement and threat tracking.
Current power is a separate question. A simple kit can lose because of a bad matchup, a poor draft or an unfamiliar role. The comparison below asks what the player repeatedly has to operate and which useful action remains after a mistake.
Why Riot’s difficulty tag is only a clue
Data Dragon includes an info.difficulty field from 0 to 10. It looks authoritative because it is numerical. It is still a coarse catalog label with no published mechanical formula, and some new or incomplete records can show zero.
The current files illustrate the problem. Miss Fortune is marked 1 and Malphite 2, which fits the broad expectation. Garen is marked 5, while Annie and Malzahar are both 6. That does not mean Garen requires more precise hands than champions with dashes, resets, or several skillshots. The field may reflect more than raw execution, and it is not maintained as a transparent competitive score.
This article uses current Riot spell text to understand the kits. It does not convert info.difficulty into points or let that field decide the order.
The top ten at a glance
| Rank | Champion and normal role | One-sentence job | Main repeated check | Fallback after a mistake |
|---|---|---|---|---|
| 1 | Yuumi, support | Attach to the right ally and keep that ally functional | Best Friend and safe moments to detach | Shield, heal, slow, or steer R while attached |
| 2 | Garen, top | Take a short trade, absorb the return, leave, then execute low health | W timing and passive recovery | Disengage, regenerate, or clear a side wave |
| 3 | Malphite, top | Survive lane, then knock up a target the team can reach | Shield, mana, and allied follow-up | Q slow, E attack-speed reduction, or peel R |
| 4 | Sona, support | Stay near allies and rotate damage, protection, and movement | Power Chord’s next effect | Heal, shield, speed up, or peel with R |
| 5 | Malzahar, mid | Push with E and Voidlings, then suppress one exposed threat | Passive shield and safe R channel | Clear the wave or suppress a diver |
| 6 | Annie, mid | Hold the stun, burst or peel one reachable target, and command Tibbers | Four-spell stun cycle | Targeted Q stun, ally shield, or defensive Tibbers |
| 7 | Miss Fortune, ADC | Trade through a bounce, then channel R from a protected angle | Love Tap target and channel safety | E slow and ranged ultimate damage |
| 8 | Amumu, jungle | Reach a fight, lock enemies near allies, and remain in the middle | Q charges and ally distance | AoE stun, persistent damage, or peel |
| 9 | Rammus, jungle | Roll into the attack-reliant threat and force it to hit you | Powerball route and W timing | Point-and-click taunt and defensive body |
| 10 | Sivir, ADC | Clear safely, block one key spell, and attack the closest safe target | Spell Shield timing and attack movement | Wave clear and team movement speed |
Yuumi and Rammus show why the order is about operational burden. Attached Yuumi avoids most walking inputs, while Rammus still has to steer his approach and find a useful attacker. That distinction can hold regardless of which champion wins more games in a particular patch.
1. Yuumi removes the most movement execution

Yuumi takes first place because no other normal-role champion removes as much moment-to-moment movement from its basic operating loop. You and Me! attaches her to an allied champion. While attached, she follows that ally and is untargetable except by towers. The host walks, kites, dodges, and chooses most of the path. Yuumi can spend attention on Prowling Projectile, Zoomies, Final Chapter, the minimap, and the identity of the best host.
Her one-sentence job is short: attach to the ally most capable of carrying the next fight, then keep that ally attacking and alive. Zoomies shields its target, grants attack speed, and supplies movement speed while the shield persists. While attached, it affects the ally and can restore mana. Final Chapter sends waves that damage and slow enemies while healing allies; excess healing becomes a shield. Yuumi can cast Zoomies and move or attach during the channel under the current kit rules.
Prowling Projectile is the mechanical exception. While attached, Yuumi can guide the missile with the cursor for a short period before it accelerates in a straight line. A long flight produces the enhanced version, and the Best Friend interaction improves it further. The spell asks for aim, but missing it does not move Yuumi into the enemy team.
The hidden work is host selection
Feline Friendship creates a special bond with allies, and the ally with the strongest bond becomes Yuumi’s Best Friend. The Best Friend upgrades attached abilities. That makes early attachment history matter. Permanently riding the first ADC regardless of the game can leave better options unsupported. Constantly jumping between allies can create danger and fail to build the bond the kit wants.
The easy controls therefore hide a decision problem. Which ally can safely enter? Who uses on-hit healing and attack speed? Which champion will still be alive when Final Chapter finishes? Is detaching for a passive heal worth becoming targetable? Immobilizing effects place attachment on cooldown, so a careless detach can remove the mechanic that earned first place.
Yuumi is easy to operate at a basic level and still easy to play badly. Her fallback is to stay attached, shield the host, heal through the ultimate and slow the chase route. That explains her place for low input demands; it is also why another champion may teach positioning better.
2. Garen is the easiest self-driven champion

If Yuumi’s movement shortcut feels like an exception, Garen is the cleanest conventional answer. He has no aimed projectile, no dash reset, no alternate form, no resource bar, and no multi-stage ultimate. Every button has a visible purpose.
Decisive Strike removes slows, grants movement speed, empowers the next attack, and silences. Courage passively builds defenses from kills and can be activated for damage reduction, a brief shield, and tenacity. Judgment deals repeated damage around Garen and can be ended early. Demacian Justice targets an enemy champion and deals true damage that increases with the target’s missing health.
The operating loop can be learned in one lane: approach with Q available, use W against the important return spell, let E finish its useful damage, then leave. If the enemy falls low enough, R closes the trade. If the exchange goes badly, Perseverance restores a percentage of Garen’s total health after enemy damage and abilities stop reaching him.
That passive is more than forgiveness. It is a real fallback action. Walk away, preserve experience range when possible, stop taking meaningless poke, and let the health bar recover. Many easy-looking champions still demand another risky interaction after a mistake. Garen can decline it.
Easy inputs do not decide the wave
Judgment hits nearby minions. The same button that damages a champion can break a freeze, push the lane toward a gank, or kill minions the player wanted to hold. Decisive Strike can begin a trade or remove a slow during the exit. Courage is simple to cast, but pressing it after the opponent’s strongest spell lands wastes its best window.
Those are decisions, not difficult mechanics. Garen remains second because the punishment is readable. The player knows whether Q went in or out, W met the large spell, E touched the wave, and R found a low-health target.
3. Malphite asks for one accurate arrival

Malphite compresses a top-lane tank into one defensive state and one decisive arrival. Granite Shield absorbs damage based on maximum health and returns after he avoids damage for several seconds. Seismic Shard is point-and-click, deals magic damage, slows the enemy, and gives Malphite the stolen movement speed. Thunderclap empowers an attack and creates aftershocks. Ground Slam damages around him and reduces enemy attack speed.
Only Unstoppable Force asks for a major ground-targeted commitment. Malphite dashes unstoppably to the chosen location, damages enemies, and knocks them up. The input is simple enough to understand on sight. The difficulty is whether the target matters and allies can reach the landing.
That gives him one of the clearest one-sentence jobs on the page: absorb the lane, then use R on a valuable target inside allied follow-up range. When the perfect engage never appears, Malphite still has a fallback. Q can slow a diver or help him leave. Ground Slam can reduce an attacker’s output. The ultimate can peel instead of starting.
His mechanics become even lighter into attack-reliant physical opponents because armor and Ground Slam naturally support the same close fight. That does not make him universal. Magic-heavy teams and champions who spread across several angles reduce the value of the simple plan. Mana also limits careless Q use in lane.
Malphite sits below Garen because one missed ultimate can spend the champion’s main event, while Garen’s recovery pattern repeats. He sits above the remaining eight because everything before and after R has such a low execution burden.
4. Sona makes basic support output nearly automatic

Sona’s basic abilities reduce target-selection work. Hymn of Valor damages the nearest two enemies and prioritizes champions. Aria of Perseverance heals Sona and a nearby wounded ally, prioritizing the most wounded, then gives nearby tagged allies a shield through its aura. Song of Celerity grants movement speed to Sona and allies who enter its short aura.
The player still chooses when and where to cast, but not which low-health ally receives every W or which two nearby enemies receive every Q. That is a large mechanical reduction for support.
Her normal job is to remain near enough to tag allies without becoming the first target, then rotate damage, protection, and movement as the fight changes. If the team is retreating, E and W remain useful. If an assassin enters, W’s Power Chord can reduce the target’s damage and Crescendo can stun across a line. If allies are chasing, E and its slowing Power Chord help close the distance.
One counter creates three different attacks
Power Chord prevents Sona from becoming completely automatic. Every few basic casts empower her next attack, and the last basic spell determines the extra effect. Q creates a higher-damage chord. W makes the target deal less physical and magic damage for a short time. E slows.
That is one recurring check with three answers. It does not demand fast fingers, but it rewards planning the last spell before the empowered attack. Accelerando also rewards successful basic ability use with permanent non-ultimate ability haste up to a cap, then reduces remaining ultimate cooldown after the cap.
Sona ranks fourth because her actual inputs are easier than her survival. She is fragile, short aura ranges invite one step too far, and no attachment mechanic removes movement. A missed position can end the fight before another W. The fallback is strong if she stays alive: heal, shield, speed, and hold Crescendo for the enemy crossing into the team.
5. Malzahar turns the wave into a repeatable routine

Malzahar is the easiest mid laner for a player who wants the wave to demand fewer precise last-hit inputs. Malefic Visions damages over time, executes minions below its threshold, restores mana when the victim dies, and spreads to the nearest enemy. Void Swarm summons one Voidling plus more for stacks generated by other spell casts. Voidlings are attracted to targets carrying Malefic Visions.
The repeatable sequence is not fully automatic, but it gives the lane a stable rhythm: place E where it can finish a minion, build W stacks through other casts, summon Voidlings when they can reach the infected wave, and protect them from instant removal. Call of the Void fires inward between two portals after a delay, damages, and silences. It can refresh Malefic Visions on the target.
Void Shift supplies another layer of forgiveness. After Malzahar avoids damage and crowd control for a period, he gains heavy damage reduction and crowd-control immunity that lingers briefly when broken. The shield does not make bad positioning correct. It often prevents the first poke or control spell from immediately deciding the lane.
Nether Grasp gives Malzahar his one-sentence fight job: suppress the exposed champion whose removal lets the team win the next few seconds. It is targeted and creates a damaging zone. It also channels, holding Malzahar still. That means the easiest catch button in mid can become self-crowd-control if used in range of several enemies with no ally ready to act.
The fallback is why he reaches fifth. If a roam is unsafe, clear the wave. If the back line cannot be reached, suppress a diver. If Void Shift is down, wait rather than invent a trade.
6. Annie is simple only after the stun is accounted for

Annie’s damage spells are mechanically direct. Disintegrate targets a unit and refunds mana plus part of its cooldown when it kills. Incinerate covers a cone. Summon: Tibbers damages an area and creates a controllable pet that burns nearby enemies. Molten Shield can target Annie or an ally, grants a shield and movement speed, and damages enemies that strike the shielded target once per shield.
Pyromania supplies the recurring check. After four spell casts, Annie’s next offensive spell stuns. She begins the game and respawns with the stun ready under the current kit. The passive indicator tells the player when a targeted Q, cone W, or Tibbers cast can control opponents.
Her job fits in one sentence: keep the stun available for a reachable priority target, then use Tibbers to extend pressure after the first cast. The execution burden is low because Q can guarantee the stun on one target and Tibbers covers an area. The check burden is higher than Garen or Malphite because every basic cast changes proximity to the next stun.
Annie falls to sixth for two reasons. First, spending Pyromania on the wave can remove her threat at the exact moment a fight starts. Second, Tibbers remains a controllable unit after the cast. Reissuing orders is not mechanically extreme, but ignoring the pet leaves damage and zone pressure unused.
She has a useful failed-combo response. Shield an ally, move Tibbers, use the next Q cycle to peel, and wait for another Pyromania. A missed area cast does not delete the targeted Q from the kit.
7. Miss Fortune is easy for an ADC, not easy instead of ADC
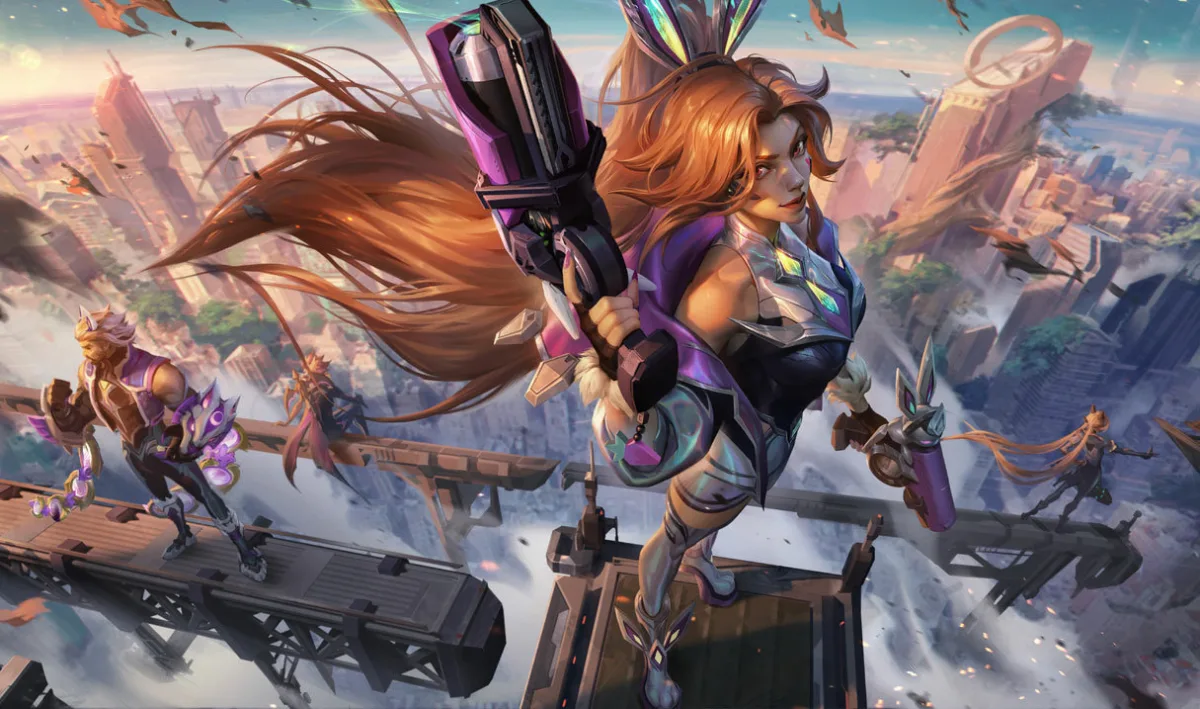
Miss Fortune is the lowest-friction marksman because each spell has a clear shape. Double Up hits one target and bounces to another behind it. The second shot always critically strikes if the first target dies. Strut supplies out-of-combat movement speed and an active burst of attack speed. Make It Rain reveals and slows a ground area. Bullet Time channels damage through a wide cone.
Her passive, Love Tap, rewards attacking a new target. It makes target switching valuable without creating a long combo. In lane, a player can last-hit one minion, threaten a Double Up bounce through another, and return to the wave. In a fight, the simple plan is to attack what is safe until allied control creates a protected Bullet Time angle.
The champion is seventh because marksman operation never becomes truly low input. Basic attacks must be issued repeatedly. Movement between attacks matters. Enemy engage ranges change every safe step. Bullet Time is easy to press and easy to cancel through poor positioning or incoming crowd control.
Miss Fortune earns her place through fallback value. A bad attack angle can become a Make It Rain slow. A fight that is unsafe for repeated attacks may still allow a distant Bullet Time across allied crowd control. Strut helps reposition before the next wave or objective. She does not need to execute a dash reset or manage two weapons.
Miss Fortune’s readable spell sequence does not remove the ADC’s continuous work. She still has to last-hit, move between attacks and find a channel angle that the opposing team cannot easily break.
8. Amumu keeps the combo short while jungle stays hard

Amumu is the clearest example of mechanical ease separated from decision difficulty. Jungle asks where to path, which lane can move, whether an invade should be answered, when to start an objective, and how much time a gank may spend. None of those questions becomes easy because the champion has a short combo.
The kit does reduce execution once the decision is made. Bandage Toss is a line skillshot that pulls Amumu to the first enemy hit, stuns, and holds two charges. Despair toggles persistent nearby maximum-health magic damage. Tantrum passively reduces incoming physical damage, damages around Amumu when activated, and refreshes faster as attacks hit him. Curse of the Sad Mummy stuns around him, deals magic damage, and applies Curse.
The one-sentence job is obvious: arrive close enough for allies to follow, stay beside enemies, and use R when its area stun changes the fight. Two Q charges soften the punishment for one miss. W and E do not demand aim after Amumu enters. R covers the immediate area rather than asking for a narrow line.
His fallback is defensive. If the intended back-line engage is gone, hold the second Bandage Toss, stand near the allied carry, and stun the diver. If a gank fails but health remains, return to camps instead of throwing the second Q into a turret. Amumu can still clear and provide group control without an early lead.
Amumu ranks below Miss Fortune for ease because the first contact often depends on a skillshot and because every mechanical action spends jungle time. A simple crowd-control sequence does not simplify the map that feeds it.
9. Rammus has fewer combat decisions than travel decisions

Rammus ranks ninth because the approach remains conditional. Steering Powerball, choosing a useful attacker and entering with a playable defensive window ask more than the point-and-click combat loop first suggests.
Powerball accelerates over several seconds, stops on enemy collision, knocks back, and slows nearby enemies. Terrain, minions, pets, and the front line can block the route to the desired target. Soaring Slam targets an area, slows through repeated aftershocks, and gains range with movement speed. When cast during Powerball, it adds center damage and a knock-up.
Once Rammus reaches the correct champion, the controls become extremely light. Frenzying Taunt targets an enemy champion or monster. Defensive Ball Curl grants armor and magic resistance and returns magic damage to attackers. The normal sentence is: roll at the attack-reliant threat, taunt it, and activate the defensive state while it is forced to attack.
That sentence also reveals the draft condition. Rammus is much easier to justify into opponents who depend on basic attacks and physical damage. Against spell-heavy damage, repeated magic threats, or teams that can block Powerball while the carry stays distant, the simple combat script loses its target.
The fallback action is reliable. Taunt the champion attacking an ally, activate Defensive Ball Curl, and occupy the path rather than chasing the original carry. Rammus falls below Amumu because the approach is continuously steered, the center interaction on R matters, and poor target access can make the easy buttons irrelevant. Those operational checks remain even in a favorable draft.
10. Sivir buys a second chance with wave clear

Sivir is not the tenth easiest set of four buttons in isolation. She is the second marksman because her kit provides a simple recovery action after pressure is lost.
Boomerang Blade travels out and back, damaging enemies along both paths. Ricochet grants attack speed for several attacks and bounces those attacks through nearby enemies. Together they clear waves quickly. On The Hunt grants nearby allies movement speed, while Sivir’s champion attacks during the ultimate reduce her basic cooldowns and takedowns can refresh the duration.
The difficult button is Spell Shield. It blocks the next incoming enemy ability during a short window. When the barrier catches an ability, Sivir restores health and activates Fleet of Foot. The cast is simple; the timing demands knowledge of which hostile spell matters, when it will land, and whether a less important hit is about to consume the shield first.
Her one-sentence job is still manageable: clear the wave, block one important spell, and attack the closest target that can be hit safely. The last clause contains the ordinary ADC burden. Sivir must move between attacks, track engage ranges, and avoid stepping forward merely because Ricochet can bounce toward a distant carry.
Why include her over Ashe or Jinx? When Sivir misreads a fight or lane, she can often return to the next wave and remove it quickly. That fallback can protect a tower, delay a siege, or buy a teammate time to respawn. Ashe supplies more utility but has no normal escape and exposes every spacing error. Jinx has weapon switching, a line skillshot, trap placement, and reset movement to manage.
Sivir’s tenth place acknowledges that “easy ADC” is relative. Her spell kit has a clear purpose, but repeated attack movement remains real execution. Wave clear and a shield buy options without doing that movement for her.
Easy-looking champions that missed the list
Several famous beginner picks have simple descriptions and a higher operational bill than the reputation suggests.
Master Yi has a point-and-click Alpha Strike and an obvious damage ultimate, but fight timing is unforgiving. Alpha Strike changes his location, Meditate timing can decide survival, and takedown-based cooldown reduction accelerates the sequence when the screen is busiest. Easy buttons do not produce an easy entry window.
Nasus targets enemies with Q and W, yet every wave asks which minion receives Siphoning Strike, whether stacking breaks the lane state, and whether the champion can safely reach the wave. His buttons are direct. His calendar is not.
Lux casts from range, but three meaningful combat spells depend on line or area aim. Missing Light Binding removes protection as well as offense. She is a good step after Annie, not a lower-execution champion than Annie.
Ashe has readable spells and excellent utility. Her lack of a normal dash makes attack movement and threat-range judgment constant. That honesty can make her a strong teacher and a less forgiving operator.
Nautilus and Leona have clear engage jobs, but the first line skillshot or target dash moves them into danger. A successful hit can be the mistake if allies cannot follow. Sona’s basic output has a safer fallback.
Trundle nearly took a jungle slot. Chomp, Frozen Domain, and Subjugate are direct. Pillar of Ice can save an enemy, interrupt an ally’s path, or decide a fight through placement. Rammus and Amumu have clearer fallback control for this particular ranking.
The easiest choice in each role
If the cross-role order is less useful than a role decision, use these pairs.
- Top: Garen for repeatable trades and self-recovery. Malphite when the team needs an obvious engage and the enemy draft rewards armor.
- Jungle: Amumu for general group control. Rammus when the enemy has attack-reliant targets worth taunting.
- Mid: Malzahar for wave routine and targeted suppression. Annie for a visible stun cycle and more direct burst.
- ADC: Miss Fortune for a simple lane threat and wide teamfight channel. Sivir for wave recovery and one-spell defense.
- Support: Yuumi for the smallest mechanical floor. Sona for a more conventional support who still controls her own movement and positioning.
Choose the first name when the stated job matches the reason for playing the role. Choose the second when its specific fallback solves the draft. Do not select Yuumi merely to avoid movement if the goal is to learn movement, or Rammus before checking whether the enemy has a suitable attacker.
One final test before locking the champion
An easy champion should survive four plain questions in champion select:
- Can the job be said in one sentence without ability jargon?
- Is there only one champion-specific state that must be checked repeatedly?
- After the key spell misses or the first plan fails, is there still a useful action?
- Is the current role itself acceptable, or is the player using an easy kit to avoid a role they do not understand?
Yuumi wins the pure input test. Garen wins the conventional champion test. Malphite has the cleanest single engage. Sona has the lightest normal support targeting. Malzahar simplifies the wave. The remaining five are easy relative to their roles, not exempt from those roles.
That is the useful meaning of easy in League: fewer controls between the player and a clear job, with enough left in the kit to recover when the first attempt is wrong.