
At 38 minutes, nobody cares that you cleared your first Gromp seven seconds faster. One Baron call, one exposed carry, or one mistimed engage decides the game. The best scaling junglers arrive at that moment with a dependable way to win it.
Bel’Veth leads this editorial shortlist for her stack growth, True Form and the map pressure she can gain from Void coral. Fiddlesticks follows for an unseen Crowstorm into a grouped fight. Rammus belongs third only in attack-heavy physical drafts. Rhaast Kayn, Briar, Kha’Zix and Shyvana complete the seven with different ways to turn resources into a later fight.
This is not a list of junglers who can farm for 30 minutes and hope the scoreboard fixes itself. Each pick needs an early plan, a real spike, and a late-game condition the player can still execute when both teams group.
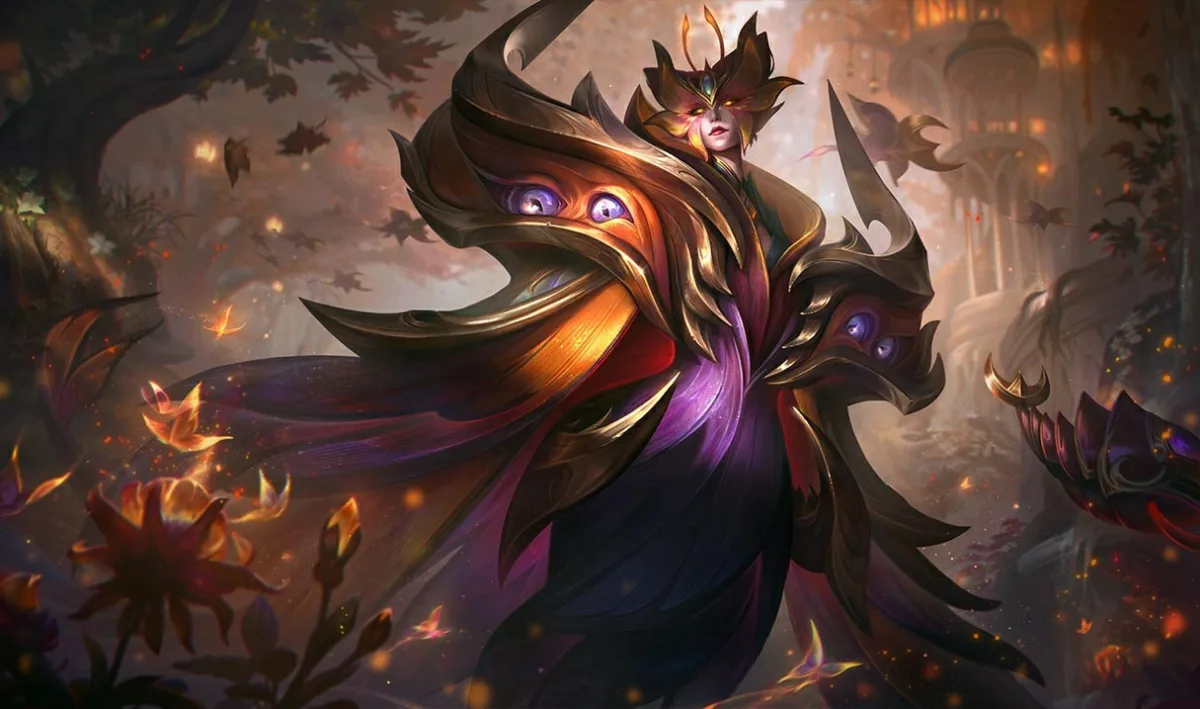
Bel’Veth’s late plan depends on stacks, True Form and access to the coral that turns a won fight into map pressure.
Reviewed for modern PC Summoner’s Rift Patch 26.18 on September 10, 2026. The order compares late-fight access and payoff. Master Yi’s durability and pursuit buffs are included, and modern Shyvana remains separate from the Classic kit.
What scaling means in the jungle
A champion does not become a great late-game jungler simply because one ability stacks forever. Jungle scaling has to survive three separate tests.
The first test is the payoff a later fight actually permits. More attack speed matters only while the champion can attack; a stronger ultimate matters only if its setup is available. We compare repeatable damage, target access, defensive answers and the map reward after a takedown.
The second test is conversion. Camps stop being the main source of leverage once inventories fill and death timers stretch. The champion needs to turn gold, levels, stacks, a transformed kit, or completed items into something useful around Baron, Elder Dragon, a defended inhibitor, or a contested side lane.
The final test is reliability. Late damage means little if the champion cannot reach a target, survive crowd control, or contribute when the enemy stays grouped. Rammus can be extraordinary into four physical attackers and ordinary into heavy magic damage. Kha’Zix scales through evolutions and vision control, but his isolation condition becomes harder when five opponents stand together. Those conditions belong in the ranking, not in fine print after it.
How to compare the late-game payoff
The order is a kit-and-draft judgment, not a measured 26.18 duration curve. A completed build does not give every jungler the same job. Compare the enemy front line, the control that can stop you, and the resources your champion must collect before choosing a scaling plan.
A long match also selects for particular game states. A team that can contest vision gives Fiddlesticks a different fight from one trapped in base; an attack-heavy enemy gives Rammus a different target from a mage-heavy composition. Those conditions matter more to this shortlist than a label such as hypercarry.
Use the table to choose the late fight your team can create. No current win-rate or duration sample is used to settle the order, and the seven are not a promise that every listed champion beats every omitted champion at full build.
The seven best scaling junglers at a glance
| Rank | Jungler | Early plan | True spike | Scaling condition | Best draft | Failure mode |
|---|---|---|---|---|---|---|
| 1 | Bel’Veth | Full clear while preserving river access | 40 and 80 stacks plus True Form | Keep collecting stacks and secure Void coral | Lanes can contest Herald or Baron setups | Early invade, hard control, no access to coral |
| 2 | Fiddlesticks | Clear toward six without forcing low-value ganks | Rank-two Crowstorm plus an AP core | Enter unseen and out of combat to fear grouped targets | Allied vision control around objective chokes | A ward sees the channel, then disengage breaks the R |
| 3 | Rammus | Track the enemy carry and avoid useless fights | Two durability items into physical damage | Enemy team must rely on attacks and armor-sensitive damage | Multiple AD carries or on-hit champions | AP-heavy damage, cleanse, disengage |
| 4 | Kayn, usually Rhaast | Farm efficiently while taking safe form progress | Correct form plus two completed items | Rhaast reaches several durable targets | Enemy has melee front line and extended fights | Late form, wrong form, anti-heal and kiting |
| 5 | Briar | Take controlled skirmishes and preserve E | Durable damage core with ranked abilities | Stay on a valuable target without losing control | Enemy must fight in corridors or commit forward | Frenzy follows the wrong unit into layered control |
| 6 | Kha’Zix | Farm toward six and punish isolated routes | Two evolutions and a vision advantage | Create isolation before the five-on-five starts | Enemy carries must catch side waves | Tight grouping, shields, reliable peel |
| 7 | Shyvana | Full clear, stack Scalemail, trade weak-side objectives | Durable core and a prepared Dragon Form | Enter with shield, form, and room for a second rotation | Team needs mixed damage and a front-to-back body | Forced fights before form or against layered disengage |
1. Bel’Veth turns one objective into a second army

Bel’Veth scales through permanent attack speed, improved True Form, and the map pressure created by Void Remora.
Bel’Veth used to create an awkward argument. Her passive promised endless attack-speed growth, yet her strongest games often came from early invades, Herald fights, and snowballing Void Remora before opponents could group. Riot addressed that contradiction in Patch 26.15.
The update reduced her starting attack speed, attack damage, armor, health, and early Q access. In return, Death in Lavender stacks gained much stronger top-end attack-speed scaling. Royal Maelstrom improved with ability ranks, and Endless Banquet received a bigger late transformation, including True Form that can last until death after enough stacks. Riot described the goal plainly: move early power into her "evolution fantasy and stacking mechanic."
Patch 26.16 cut Bel’Veth’s health growth and reduced True Form’s rank-three attack-speed bonus after the scaling update. The follow-up matters: the stack thresholds reward resource collection, but she still has to survive contact and obtain coral before the later state can help.
What the spike looks like in a real game
Bel’Veth does not have one shopping-list spike. She layers several clocks on top of each other. Large monsters and champion takedowns add permanent passive stacks. Ability ranks make Q easier to cycle and E more durable. At 40 and 80 stacks, the transformation rules become much more forgiving. A Void epic monster coral can also unlock Remora, turning an objective win into a siege that asks the enemy to answer several lanes.
The late-game sequence is not "press everything on the ADC." Bel’Veth wants the first knockup or allied control to create a safe Q angle. She can then build Endless Banquet’s repeated true damage across attacks while holding Royal Maelstrom for the dangerous part of the return trade. E roots her in place. Casting it before the enemy commits wastes the damage reduction and gives opponents time to leave.
Her best late win condition is Baron control. If Bel’Veth’s team owns vision and threatens a Void coral, the enemy cannot casually concede the objective and defend one wave. Remora make the consequence bigger than the buff itself.
What still beats her
Bel’Veth’s reworked scaling does not erase her weak opening. A jungler who invades with moving lanes can take camps, deny stacks, and delay the levels that make Q and E feel complete. In teamfights, point-and-click control or layered knockbacks can keep her away from the target long enough for True Form’s stats to stop mattering.
Pick Bel’Veth when your solo lanes can contest river and your support is willing to establish objective vision. Avoid her when all three lanes are likely to lose priority and the enemy jungler can enter on the second camp rotation. Scaling is expensive when the map will not let you collect it.
2. Fiddlesticks turns one dark angle into five fears
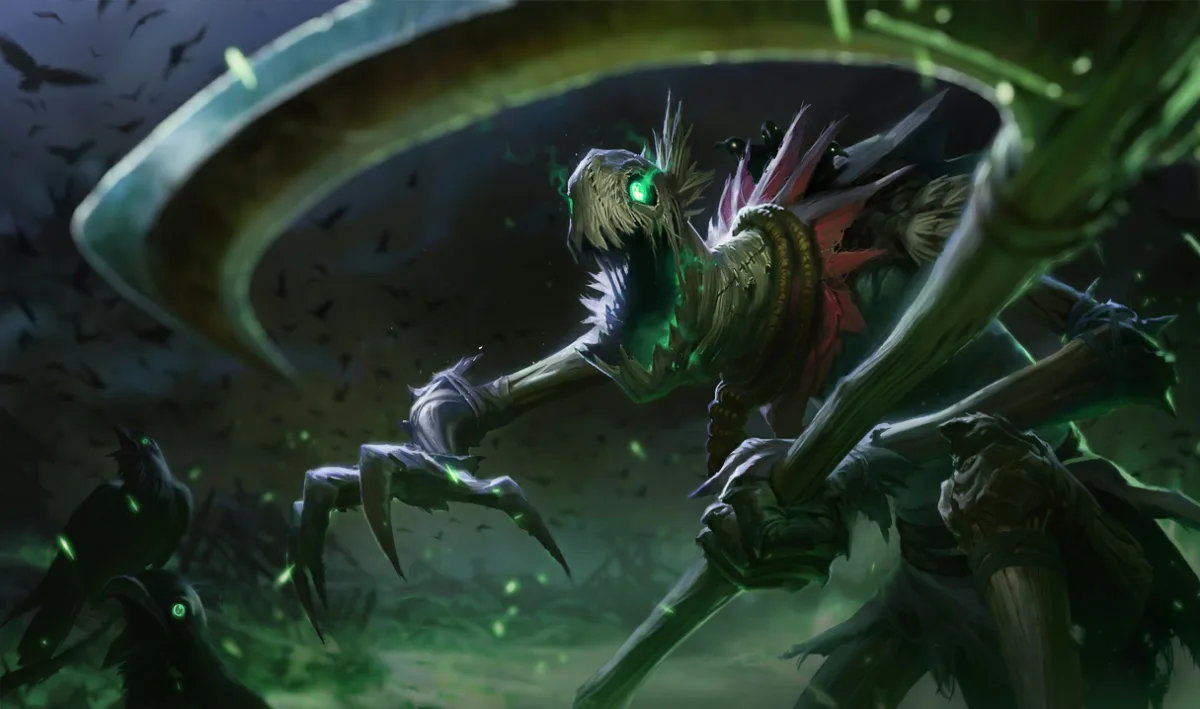
Fiddlesticks scales by converting denied vision into an unseen Crowstorm, a team-wide fear, and several seconds of area damage.
Fiddlesticks earns second through access to a grouped fight. Crowstorm can deliver area damage and fear from an unseen angle without first walking through the enemy front line. That setup is powerful only when your team can deny vision and keep opponents near the landing area.
Crowstorm’s landing explains the payoff. A late Baron or Elder fight draws players toward a small number of entrances, where a channeled blink and several seconds of area damage can punish a grouped approach. Terrify adds the critical condition: damaging spells can fear enemies while Fiddlesticks is unseen and out of combat. Keep the setup concealed and avoid entering combat before the cast.
Gold and levels improve more than the damage total. Rank two and three Crowstorm make each objective setup more threatening. AP turns a successful channel into a real kill window. Bountiful Harvest drains nearby enemies and deals bonus execute damage at the end, which punishes a team that stays inside the storm to finish Fiddlesticks. Reap slows everyone it catches and silences targets hit in its center, giving the follow-up a second way to disrupt a counter-engage.
The late-game job begins before the ultimate channel. Fiddlesticks replaces its trinket with scarecrow effigies, but an effigy is not permission to assume a pocket is dark. Arrive before the objective, clear the approach with your support, place an effigy where it covers both vision and a likely flank, then watch which wall the enemy carries stop checking. A visible front-to-back Crowstorm delivers damage without the opening fear and gives opponents time to hold displacement or escape tools.
That setup cost keeps Fiddlesticks below Bel’Veth. A losing support cannot safely establish the darkness it needs. A ward on the channel point, a fast disengage, or control held for the landing can turn the decisive ultimate into a long cooldown. Fiddlesticks is also a poor answer when the team already has abundant magic damage and no champion willing to occupy the enemy’s first line.
Pick it when your composition can contest vision and make opponents enter a choke. At 35 minutes, do not hover beside the allied tank and advertise the angle. Threaten from outside the camera, force the enemy to respect two entrances, and cast only when the first targets cannot simply walk away. Fiddlesticks ranks second because its late condition is repeatable, but only for a team that helps create the dark.
3. Rammus is the late-game answer to the right draft
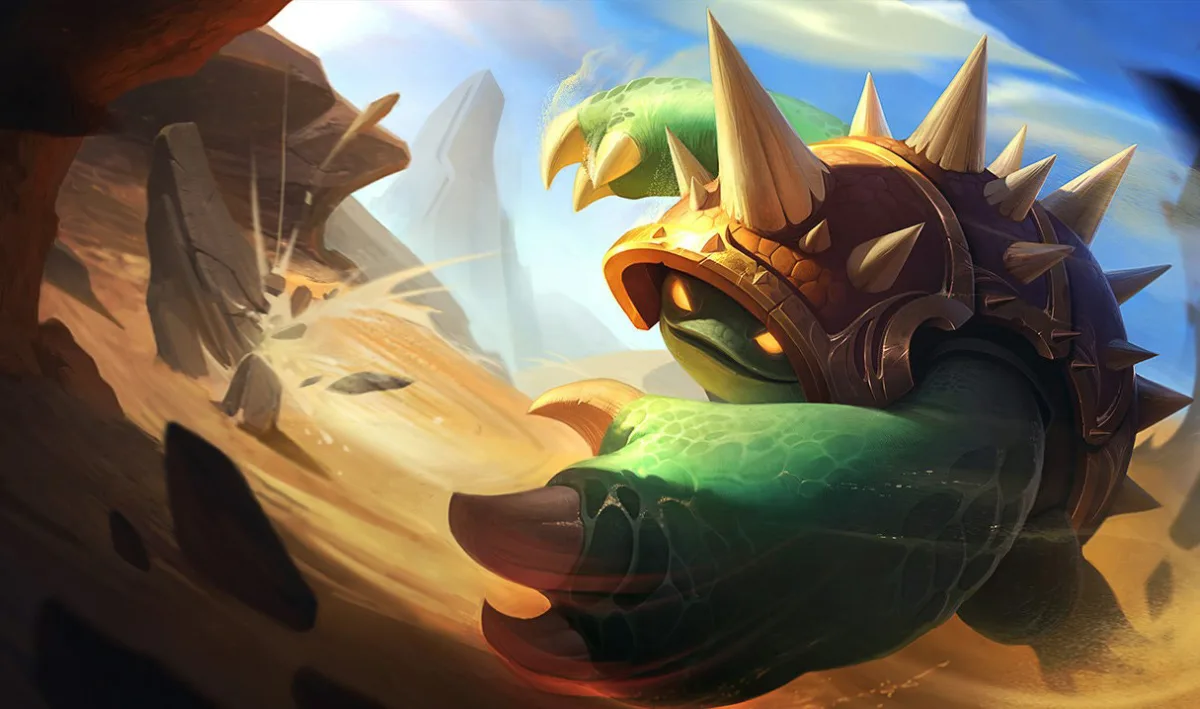
Rammus becomes a brutal late-game specialist when the enemy draft keeps paying him in armor value.
Rammus is not a universal hypercarry, and that is exactly why his third-place finish needs context. In the correct game, he has one of the most reliable late conditions on this page: identify the attack-based carry, reach it with Powerball or Soaring Slam, and force it to hit Defensive Ball Curl through Frenzying Taunt.
His current passive converts armor and magic resistance into bonus attack damage. Defensive Ball Curl raises both defenses and returns damage to attackers. The more gold he spends on the resistance that counters the enemy, the more his defense, reflected damage, jungle pet damage, and basic attacks reinforce the same plan. Patch 26.16 also increased jungle pet ratios from bonus armor, magic resistance, and bonus health, a small systems win for tank clears as games progress.
Rammus benefits when a later carry must keep attacking into his defenses. Defensive Ball Curl and taunt make that contact costly, but the argument weakens sharply against magic damage, true damage, disengage or enemies who can avoid attacking him.
The limitation is just as clear. Rammus does not scale into a draft with two AP threats, percentage-health magic damage, reliable cleanse, and ranged disengage merely because the clock reaches 40 minutes. He may become durable, but his chosen target can walk away after the taunt or force him to approach through slows.
Draft him after seeing the reason. Two marksmen, Yasuo or Yone beside a physical jungler, or an on-hit carry with limited cleanse options can justify Rammus early in the order. If you are blind picking, Bel’Veth or Rhaast asks fewer questions of champion select.
4. Rhaast gives Kayn the repeatable late fight

Kayn belongs here through Rhaast’s sustained fight, not through a blanket claim that both forms scale the same way.
Kayn’s name appears on scaling lists because he literally unlocks a stronger kit during the match. That explanation is incomplete. Shadow Assassin often spikes hardest when fragile carries lack defensive items and the map still has open flanks. Rhaast is the form that usually earns a place in a late-game ranking.
Rhaast heals from spell damage dealt to champions and fights durable targets with percent-health damage. Reaping Slash can hit several frontliners, Blade’s Reach supplies repeatable control, and Umbral Trespass buys time inside a target before healing and re-entering. Those tools improve when the fight lasts long enough for a second spell rotation.
The form is not free power. Kayn must interact with champions to earn it, and bad form chasing can destroy a good clear. Crossing the map for the correct color of orb while camps, Void Grubs, or a guaranteed countergank are available delays the transformation more than it helps. The early plan should still maximize gold and take form progress when the play is already sound.
Choose the form from the draft. Rhaast wants health-stacking frontliners, melee champions who stay inside Q, and fights around narrow entrances. Shadow Assassin wants several fragile ranged targets and enough allied pressure to keep them separated. Combining those two plans into one scaling label hides the actual choice.
Patch 26.17’s second Sundered Sky nerf lowered the item’s health from 450 to 400 and attack damage from 45 to 40. That does not remove Rhaast’s scaling, but it weakens one comfortable bundle of damage and sustain. Recheck the current build rather than buying a familiar item on memory. The champion’s true spike is the correct form plus a coherent two-item core, not the label on one patch’s most popular purchase.
5. Briar scales hard, then asks you to keep control

Briar has the durability and damage to finish late fights, but her frenzy can turn one targeting error into a full death timer.
Briar’s late curve is easy to understand and difficult to execute. Crimson Curse stacks a bleed and heals her from the damage. Her healing grows as her health drops. Blood Frenzy adds attack speed, movement speed, area damage, a missing-health bite, and another heal. Chilling Scream can end the frenzy, reduce incoming damage, restore health, and punish anyone trapped against terrain.
Gold makes every part of that loop more threatening. Health buys time for the bleed and missing-health healing to work. Damage strengthens the bite and forces opponents to respect the frenzy. Ability ranks reduce the windows in which E or another control tool is unavailable. Certain Death adds armor, magic resistance, life steal, and movement speed while Briar pursues the marked champion.
Briar can extend a fight through repeated contact and sustain, but her commitment makes the later sequence less forgiving. Rammus can taunt a selected attacker and Rhaast can work through several melee targets; Briar must also keep a way to stop a frenzy that is carrying her into the wrong fight.
Blood Frenzy chooses a pursuit target according to its own rules. At 40 minutes, following the nearest unit two steps too far can place Briar under a turret, into a control chain, or away from the carry she needed to protect. Certain Death is even more committal. A long-range hit can be a fight-winning flank, but it also announces that Briar will travel to the target unless the situation changes first.
Good late Briar play is built around exits. Keep Chilling Scream available when the enemy has a bait target. Approach through terrain that lets a charged E create a wall stun. Use W’s recast for the bite when its healing and missing-health damage matter, not automatically on the first attack. Briar scales best into teams that must enter narrow objective corridors. She is much less convincing into layered disengage and ranged control that can redirect her commitment.
6. Kha’Zix scales through evolutions and empty space

Kha’Zix does not want a fair late five-on-five. He scales by making one opponent cross the dark part of the map alone.
Kha’Zix is the least conventional pick in this seven. He does not need a fair front-to-back fight to matter later. He needs separated targets, controlled approaches and a player who can turn evolution choices into access before the enemy regroups.
Each rank of Void Assault grants an evolution. Evolved Q improves his isolated-target access and cooldown. Evolved W spreads vision and heavy slows. Evolved E extends Leap and resets it on a champion takedown. Evolved R gives longer invisibility and another cast. By level 16, Kha’Zix has enough evolved tools to choose between killing one target, controlling an approach, and escaping after a takedown.
The word "isolated" decides whether those tools look oppressive or harmless. Enemy teams naturally group around late objectives. A straight engage into five players removes Taste Their Fear’s biggest damage condition and gives shields or peel time to answer him. Kha’Zix needs to do the work before the full fight forms.
That means clearing a Control Ward, waiting near the route from a side wave, or forcing the enemy support to check a pocket of fog without the jungler beside them. Evolved W can reveal and slow from range. Void Assault can cross a watched gap without offering an easy target. Leap should usually remain available until a kill is certain or the exit is planned.
Kha’Zix is a late-game win condition for players who understand vision pressure. He is not the pick for a team that needs its jungler to stand front and start every fight. Draft him when enemy carries must split for farm, allied side-lane pressure creates distance, and another teammate can absorb the first control spell.
7. Shyvana scales quietly through resources and form

Shyvana’s current kit rewards disciplined farming and Scalemail, but Dragon Form has to be ready before the fight begins.
Shyvana closes the list because her later value requires a prepared form and a useful entry. More resources can make her a durable mixed-damage fighter, but the clock does not create a safe route through disengage or replace a missing Dragon Form.
Her current kit still has real scaling components. Takedowns on champions, large minions, and large monsters grant Scalemail stacks that improve her defenses. Inferno Aegis gives a shield and movement speed, then detonates around her. In Dragon Form, that explosion can heal when it hits a champion. Emberstrike gains another recast in form, and Molten Burst changes its path and leaves fire behind. Dragon’s Descent supplies the transformation, movement, and fear needed to enter.
The payoff is a durable front-to-back fighter with mixed damage. Shyvana clears efficiently, arrives with more levels than a gank-heavy opponent, and can survive long enough for empowered abilities to cycle. She also benefits from the Patch 26.16 jungle pet changes because AP, armor, magic resistance, and bonus health now contribute more pet damage than they did before.
Her failure mode happens before the fight. If Dragon Form is unavailable, Shyvana loses the empowered versions that justify her placement. If she transforms for a low-value pick two minutes before Baron, the enemy can start the objective during the wrong part of her resource cycle. If every lane collapses during the first clear, Scalemail and item scaling may arrive in a game with no neutral area left to contest.
Choose Shyvana when lanes can absorb a quieter first route and the team needs a sturdier mixed-damage threat. Trade sides instead of defending every invaded camp without priority. Before a major spawn, collect the resources that prepare form, reset on time, and arrive early enough to enter from a useful angle. Her scaling is dependable only when the player respects that preparation.
Why Master Yi, Karthus, and Kindred missed the top seven
Master Yi has every familiar scaling signal. Double Strike multiplies on-hit value, Wuju Style adds true damage, basic attacks reduce Alpha Strike’s cooldown, and Highlander extends through takedowns. When the first target falls, one reset can still collapse a fight.
Patch 26.18 improves Master Yi’s armor growth and Highlander’s movement speed. Those buffs help durability and pursuit; they do not create a way to begin a grouped fight through unused hard control. Fiddlesticks offers a different kind of access, so this order remains a conditional teamfight judgment.
Yi can be correct when allied engage is already locked and the enemy lacks reliable point-and-click control. His omission is a tradeoff in fight access, not a claim that his 26.18 late-game results are poor or that his completed on-hit core lacks damage.
Karthus has a late-game kit. Requiem reaches all five opponents, AP multiplies that threat, Wall of Pain strips magic resistance, and Death Defied lets him keep casting after a lethal dive. He is also the cleanest AP alternative when a draft would otherwise deal almost entirely physical damage.
Karthus offers a real alternative when the team needs repeated magic damage and global pressure. This shortlist favors a more direct control or survival tool in its final places. That editorial choice does not establish that Karthus scales worse by a measured amount.
Kindred has a genuine scaling tool: Mark of the Kindred improves abilities and adds range at hunt thresholds. The first range reward arrives at four marks; later range upgrades do not occur at every single mark. That growth still depends on obtaining hunts rather than merely waiting for the clock.
Marks are conditional power, not scheduled income. Enemy players can contest camps, move lanes first, or force Kindred to cross the map for a predictable hunt. Lamb’s Respite can win a late fight, but it can also preserve the enemy carry and deny Kindred’s own execute timing. A skilled Kindred with eight marks and a range advantage remains frightening. This shortlist prioritizes plans that depend less on winning access to contested hunts.
Yi, Karthus, or Kindred can still be the correct draft pick. Yi punishes limited control, Karthus solves missing magic damage and threatens globally, and Kindred supplies ranged physical damage with a unique anti-burst ultimate. None received a courtesy ranking for having a famous late-game story.
How to reach late game without surrendering the map
Scaling junglers lose games when "farm" becomes an excuse to ignore every guaranteed play. A full clear is a route, not a contract. If an enemy dives your pushed top laner while you finish Krugs ten steps away, taking the free countergank may protect more future income than completing the camp on schedule.
Track lane priority before defending your jungle. Bel’Veth with two losing solo lanes should not contest an invade simply because permanent stacks are important. Cross-map, take the opposite camp, or secure a neutral resource your lanes can reach. A dead scaling jungler loses camps, tempo, and objective control at once.
Spend around the map event, not after it. The most common bad scaling sequence is clearing one extra camp, recalling late, and arriving to Dragon after vision has already collapsed. Finish the item before the objective window. If you cannot, decide whether the current fight is worth taking without it. A 300-gold component in inventory provides no scaling during the fight.
Finally, decide what the champion will do at 35 minutes before locking it. Bel’Veth wants objective control and coral. Fiddlesticks wants a dark Crowstorm angle. Rammus wants a specific attacker. Rhaast wants several durable bodies. Briar wants a corridor and an exit button. Kha’Zix wants separation, and Shyvana wants prepared form. If the draft gives your jungler none of those conditions, the clock will not invent them.
For a broader current-patch pool that includes early and mid-game options, compare our best junglers. Use this page when the late-game job is the deciding factor, not when you need one blind pick for every possible lobby.
The pick depends on the promise your draft can keep
Bel’Veth is our scaling-jungle starting point when the team can protect her farming and contest the objectives that provide coral. That is a kit-and-map recommendation for 26.18, not a verified lead on a current duration table.
Fiddlesticks is the better answer when your team can own dark space around Baron or Elder. Rammus belongs in the physical draft he was built to punish. Rhaast is safer when the fight will run through several melee champions. Briar fits a player who can manage commitment, Kha’Zix needs separation, and Shyvana needs time to prepare form.
Pick the late-game condition your composition can create. A scaling champion who reaches the wrong fight is still the wrong champion.